The Yummy Life

Individual Chocolate Dream Ice Cream Cups

Frozen in mason jars & ready to serve

Subscribe to my newsletter:
and get a free eBook instantly
Share this with your friends:

Chocolate Dream Ice Cream

ATTENTION:
You do not need an ice cream machine to make this
rich, creamy, delicious MAGIC chocolate ice cream!

I just received a copy of Cook's Country magazine in the mail, and this recipe caught my eye. They said that this ice cream was creamy and rich and chocolaty. All you do is combine the ingredients in a bowl and freeze it. 10 minutes of prep time. No churning in an ice cream machine. I was skeptical. Could it really be as good as they said? The answer: YES! It's fantastic. If you like chocolate ice cream, you'll love this easy, yummy recipe.

I froze mine in individual mason jars, because it's fun and easy to grab, serve, and eat that way--like my Mason Jar Margaritas from an earlier post. But, you can freeze it in a single large container, if you prefer.

Step-by-step photos for making
Magic Chocolate Dream Ice Cream

Step 1: Assemble the ingredients: heavy cream, salt, vanilla, sweetened condensed milk, instant coffee or espresso powder, bittersweet chocolate

IMG_4321.jpg

If you want to freeze your ice cream in individual servings like mine, they can be frozen in any small freezer-safe bowls or containers. I like using mason jars and the Libbey bowls (pictured below) because they come with lids. If you don't have mason jars, this is a great time of year to buy them when canning supplies are plentiful in stores. Walmart usually has a great selection. Here are some individual serving-size options:

  • 1 cup (1/2 pint) wide-mouth mason jars (click here for Amazon link)
  • 1/2 cup (4 oz) mason jars (click here for Amazon link)
  • 6.5 oz. bowls with lids from Libbey -- not as casual looking as the mason jars, these look pretty on the table. I got mine at my grocery store. (click here for Amazon link)

IMG_4386.jpg  IMG_4389.jpg

Step 2. If you won't be serving the ice cream the same day it's made, I recommend covering each serving with parchment paper (or wax paper) to keep the surface fresh and soft. On a piece of parchment paper, trace around the rim of the container(s) and cut with scissors.

IMG_4380.jpg  IMG_4383.jpg

Step 3. Dissolve the instant coffee or espresso in hot water; stir and set aside. (The purpose of this ingredient is to enhance and intensify the chocolate flavor. The ice cream will not taste like coffee at all; just better & more chocolaty.)

IMG_4390.jpg

Step 4. Chop the chocolate into fine pieces. It's easier to melt it this way. Put it in a big microwave-safe bowl.

IMG_4391.jpg  IMG_4394.jpg

Step 5. Add the sweetened condensed milk (you don't use the whole can; so don't dump the whole thing in the bowl--like I did accidentally--had to start over again--ugh!), vanilla, salt, and dissolved instant coffee/espresso.

IMG_4398.jpg  IMG_4401.jpg

Step 6. Microwave at full power for 10 seconds. Stop and stir. Continue microwaving and stirring in 10 second intervals just until melted. Let this cool while you whip the cream.

IMG_4403.jpg

Step 7. In a separate bowl, whip the cream with an electric mixer until soft peaks form. "Soft peaks" means that when you pull out the beaters or a spoon, the peaks of the whipped cream don't remain rigid--they flop over at the top.

Step 8. Add 1/3 of the whipped cream to the chocolate mixture. You don't need to measure--just eyeball it. Whisk it in.

IMG_4410.jpg  IMG_4412.jpg

Keep whisking until completely combined.

IMG_4415.jpg  IMG_4416.jpg

Put down the whisk and get a rubber spatula for the next step.

Step 9. Add the remaining whipped cream to the chocolate mixture, and gently fold it in. Use a light touch to ensure that your frozen ice cream will have a light texture.

What is the difference between mixing and folding? Folding is a gentler way of combining ingredients in order to maintain a lighter texture and not deflate the mixture's volume. To fold, use a large rubber spatula to cut down through the middle of the mixture; move spatula across the bottom of the bowl and come back up the side of the bowl in a circular motion, pulling up some of the mixture from the bottom over the top of the mixture. Continue cutting down the middle and pulling the bottom batter up over the top, turning the bowl as you fold so the ingredients are evenly distributed. 

IMG_4417.jpg  IMG_4421.jpg

Stop folding as soon as it's completely mixed together.

IMG_4422.jpg

Step 10. Spoon mixture into a single large container or individual jars or bowls. With one recipe batch, I filled 3 half-pint mason jars and two 6.5 oz. Libbey bowls.

Step 11. Cover and freeze for at least 6 hours and up to 2 weeks.

IMG_4426.jpg

Step 12. If ice cream won't be eaten the same day, once it's frozen, remove container(s) from freezer, cover surface with parchment paper, and return to freezer. This will keep the surface fresh.

IMG_4499.jpg

I love the convenience of having individual servings in the freezer, ready to eat.

IMG_4465.jpg

This ice cream has a light, creamy texture and rich chocolate flavor. Yummy!

IMG_4469zoom.jpg

Add some toppings, if you like. I've added whipped cream and chocolate shavings. (Hint: Use a vegetable peeler to shave a chocolate bar--easy!) Turn them into sundaes by adding hot fudge or caramel sauce, chopped nuts or fruit, etc.

IMG_4472.jpg

I'm a believer. This really is Chocolate DREAM Ice Cream. Like magic; no machine needed.

IMG_4493.jpg

Make it a yummy day!

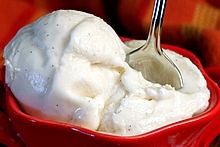
Like vanilla ice cream? Check this out:
Click to view Smooth and Creamy Vanilla Bean Ice Cream recipe

ThumbnailIMG_4443.png

Link directly to this recipe Print this recipe
Magic Chocolate Dream Ice Cream - without an ice cream machine!
By Monica              Servings: Makes 1 quart
Ingredients
  • 1 teaspoon instant coffee or espresso powder
  • 1 tablespoon hot water
  • 4 oz. bittersweet chocolate, finely chopped
  • 1/2 cup canned sweetened condensed milk
  • 1/2 teaspoon vanilla extract
  • pinch of salt
  • 1-1/4 cups cold heavy cream
Directions
In small bowl, stir instant coffee/espresso and hot water and let sit until dissolved--approx. 5 minutes. In a large microwave-safe bowl, combine chocolate, sweetened condensed milk, vanilla, salt, and  dissolved coffee mixture. Microwave at full power for 10 seconds. Stop and stir. Continue microwaving and stirring in 10 second intervals just until melted, about 1 minute total. Let cool. In separate bowl, whip the cream with an electric mixer until soft peaks form. Add 1/3 of whipped cream to the chocolate mixture and whisk until well combined. Add the remaining whipped cream to the chocolate mixture, and gently fold it in until well combined. Spoon mixture into a single large container or individual jars or bowls. Cover and freeze for at least 6 hours and up to 2 weeks.
TIP: If ice cream won't be eaten the same day, once it's frozen, remove container(s) from freezer, cover surface with parchment paper, and return to freezer. This will keep the surface fresh.

Add toppings, if desired: whipped cream, shaved chocolate, chopped nuts, fudge or caramel sauce, fruit, etc.

based on recipe from Cook's Country
Print this Recipe Share this Recipe


Posted on Thursday, July 21st, 2011
Subscribe to my newsletter and get a free eBook!
Enter your email address below and I'll send new recipes from the Yummy Life directly to your inbox (about one per week). I'll also start you off with a free copy of my eBook: 21 amazing and healthy salad and dressing recipes.
We NEVER spam or sell your information.


Post a comment
26 Comments
Lauren at Keep It Sweet says:
These look amazing! The fact that you don't need an ice cream maker is perfect for me... love it!
Reply Posted 2 years ago
Jen @ Keep It Simple Foods says:
Impressive! These little cuties are exactly what I want on a hot day like today. Would be so cute at an ice cream social, too! :)
Reply Posted 2 years ago
Monica says:
Hi Jen. I like the ice cream social idea. That would be fun!
Reply Posted 2 years ago
Sharon says:
Can these be made without the espresso?
Reply Posted 2 years ago
Monica says:
Hey Sharon. I'm sure it would still be delicious without the espresso. It's only there to deepen the chocolate flavor, but it's fine to leave it out, too. The creamy texture won't be effected at all. If you try it, let me know what you think. :-)
Reply Posted 2 years ago
miri leigh says:
Wonderful idea for company...love the mason jars!
Reply Posted 2 years ago
Monica says:
Hi Miri Leigh. I watched your TV show teaser--fantastic! I see that you do a lot of entertaining with friends. You're right, these mason jar ice creams would be fun and easy to serve when you have friends over.

I also read that you were recently in St. Louis visiting your grandma. It looks like you were here in the middle of our brutal heat wave. Must have been quite a shock for you coming from the mild temps in San Francisco.
Reply Posted 2 years ago
Memoria says:
What a great idea! I have all the ingredients too, including good Callebaut chocolate YUM! I can't believe it. Thanks.
Reply Posted 2 years ago
Monica says:
Hi Memoria. Don't you love it when you don't have to go shopping to make a new recipe? Yay!
Reply Posted 2 years ago
Lindsey @ Why Just Eat says:
What a fun idea! My 5 year old would love this - thanks!
Reply Posted 2 years ago
Janna M says:
This is just too AWESOME! I can't wait to try this recipe. You did a beautiful job showing all the steps.
Reply Posted 2 years ago
Corinne M says:
Just made this incredible dessert and can't wait until it's ready to eat (the"leftovers in the bowl were scrumptious!)! ONE SMALL THING..... I didn't see the step that says where to add inthe coffee? I added it to the melted chocoalte mixture before I put in the whipped cream. Is that correct? Thanks for sharing this - my family will love it!
Reply Posted 2 years ago
Monica says:
Hi Corinne. Good catch! Thanks for letting me know. I included the coffee addition in the explanation with my step-by-step photos, but accidentally omitted it from the printable recipe. So sorry for the confusion. I've fixed the recipe now, thanks to you! The coffee mixture is added to the chocolate mixture before it goes into the microwave, but the way you did it is fine, too. Thanks so much for the heads up about my goof. Hope your family enjoys the ice cream! :-)
Reply Posted 2 years ago
Corinne M says:
Well, we had the ice cream tonight..... FABULOUS! It's sooooo creamy and the chocolate flavor is so intensely enhanced by the coffee (which you can't even taste)! It's not like anything I've tasted before in ice cream. You get 5 stars in my book! I will make this over and over - very easy to put together. BTW....I found little 4 oz. canning jars at Walmart for under $8.00. It's the perfect size as our family does not normally eat desserts due to our diets, but everything in moderation, right? Thank you Monica!
Reply Posted 2 years ago
Monica says:
Hi Corinne! Your wonderful comment was the first thing I read when I got up this morning. What a way to start my day! I'm thrilled that you like this recipe--nothing makes my blogger heart happier than to hear that. Thanks so much for coming back and making my day. :-)

And, that is a great price and size on the Walmart canning jars. Thanks for the tip.
Reply Posted 2 years ago
Corinne says:
So, this ice cream is now haunting me as I can think of nothing else except how delicious it WAS (yes, it's all gone - so much for "in moderation"!) Ha ha ha! I came up with this idea that I am planning on trying next that I wanted to pass on to you. I am a HUGE fan of baking and make lots of cakes. The consistency of this recipe, before it is frozen, is perfect for spreading in between torted layers of cake that I'm positive will make an AMAZING ice cream cake! Can't wait to try that next! Thanks again for sharing this - you should get some sort of prize for posting it! LOL I'll also let you know when my scale reads 10 pounds more! Ha ha ha!
Reply Posted 2 years ago
Monica says:
Ooooo. I LOVE the idea of layering this with cake in a torte. You're right, the consistency is great for spreading. If you try it, let me know how it turns out. Sounds fantastic!
Reply Posted 2 years ago
Memoria says:
I just made these too. The process is very similar to making mousse. I have them in the freezer now, but I tasted the leftover, unfrozen portion, and it tastes amazing. Maybe even better than mousse. I'm sure the frozen version will be even better. Thanks for a great and easy recipe. I will have to eat this in moderation, too. Only on cheat days will I be allowed this rich dessert :).
Reply Posted 2 years ago
Monica says:
Hi Memoria. You're right--this is similar to making a mousse that magically become ice cream. So glad you've made a batch. Thanks for letting me know! :-)
Reply Posted 2 years ago
Melissa A. says:
I have these sitting in the freezer as I type! I'm making them for a going away dinner for a friend. And with ingredients like these I care not a wit about how it actually turns out, because I KNOW it can't be bad...it just can't (plus, I licked the bowl and already know how it will taste). So...I feel safe trying out a brand new recipe on guests. :-)  Thanks...can't wait to dig in!
Reply Posted 2 years ago
Monica says:
Hi Melissa. What a fun dessert for your friend's going away dinner! Hope it turned out well. Although, you're right--with these ingredients it's pretty much a sure thing. As much as we enjoyed this ice cream in our house, it's always reassuring to hear that validated by others. Thanks!
Reply Posted 2 years ago
Melissa A. says:
Monica - these were a huge hit, enough so that I'm making them again for another friend. I'm even going to buy MORE jars (since my other jars are full of homemade vanilla). Thanks AGAIN for such an easy crowd pleaser!.
Reply Posted 2 years ago
Monica says:
Melissa! Great to hear how much you like these. Thanks for the happy feedback. :-)
Reply Posted 2 years ago
Shreela says:
Since I'm extremely sensitive to the seaweed they're putting in almost all ice cream (and even regular cream, ack), I haven't eaten ice cream since we figured out what was making me so sick. Although I do have an ice cream maker, I think it's too much trouble to make such a large batch just for the two of us.

So this ice cream recipe caught my attention, and if sweetened evap milk is still carrageenan-free, I'm going to try it with the special non-carrageenan cream I had to special-order from the health food store that I'm storing in my freezer. I've read cream that's been frozen needs to be whipped longer to get results, so I'm not sure how it will turn out.
Reply Posted 2 years ago
donna says:
oh man oh man that looks soooooo delicious!! the mason jars are such a cute touch!
Reply Posted 2 years ago
Sher says:
Absolutely cannot wait to make this! I featured it on Mason Jar Crafts Blog. Thanks so much for the great tutorial. :-)
Reply Posted 2 years ago


Let's hear what you have to say
Hi, I'm Monica...
Thanks for stopping by! This is a place to chat about the good things in life with a focus on fun, easy, healthy recipes and an occasional yummy splurge thrown in.
Read more about The Yummy Life
Free Email Updates!
Subscribe to my weekly newsletter, and I'll send you a copy of my eBook for FREE!
You'll receive about one email per week with my new recipes and ideas. We NEVER spam or sell your information.


Home    |    Recipes    |    Archives    |    About The Yummy Life    |    Contact    |    Community Discussion Group
Privacy Policy - © 2013 The Yummy Life - All rights reserved