


Here are a few gift guides I made to help:
As Earth Day rolls around each year, it leads to discussions about ways to live a greener life. In today's post, I'm focusing on one small thing I do to conserve: washing and reusing plastic ziploc-type bags.
Plastic bags are both a blessing and a curse. Wow, are they convenient. I use them in so many ways, especially for freezing food. But, once used and discarded they are such a problem in our landfills, oceans, and environment in general. Plastic bags take over 400 years to biodegrade. Tons of carbon emissions are produced each year from manufacturing them. There are many reasons they are hurting our Earth.
It can be overwhelming to consider the magnitude of environmental issues like this, and it's easy to feel defeated and powerless to make a difference. But small efforts can add up. I find inspiration in quotes from some famous people to motivate me to try, in whatever small ways, to do my part for Mother Earth.
- "We must not, in trying to think about how we can make a big difference, ignore the small daily differences we can make which, over time, add up to big differences that we often cannot foresee." Marian Wright Edelman
- "Never doubt that a small group of thoughtful people could change the world. Indeed, it's the only thing that ever has." Margaret Mead
Another quote I like:
- "I don't look to jump over 7 ft. bars; I look around for 1 ft. bars that I can step over." Warren Buffet
I'm pretty sure that Mr. Billionaire Buffet was talking more about business goals (he should know!) than environmental ones. But, that philosophy applies to any attempt to achieve something big. Take baby steps over those 1 foot bars, take on tasks that are doable, and eventually and collectively we can accomplish bigger goals and make a difference.
The one foot bar that I've stepped over has been to wash and reuse plastic ziploc bags. Doesn't sound like a big deal. I know. But, it's a small thing I can do to conserve. My mom and sister have been washing their plastic bags for years, and I'm following their example.
Reduce, Recycle, Reuse - one step at at time.
We're encouraged to Reduce, Recycle, and Reuse. I'm doing all 3 of those with plastic ziploc bags.
- Reduce. Whenever I'm about to pull out a new ziploc bag, I ask myself if there's a reusable container I can use that will work just as well. Often there is. One less bag used. One step at a time. Some people eliminate rather than just reduce plastic bags. I admire that, but I'm not there yet.
- Recycle. In our community, our curbside recycling doesn't include plastic bags. So, I deposit them in a recycling bin at the grocery store. One less bag contributing to our land fills. One step at a time.
- Reuse. Before recycling my ziploc bags, I wash and reuse them until they get holes and are too worn out to be useful. If I use my ziplocs twice, I've cut my ziploc consumption in half. I usually can wash and reuse them 4 or 5 times before they're worn out. So, I'm now consuming 1/4 to 1/5 as many ziplocs as I was a year ago. A small thing, but it's something. It adds up. One step at a time. An added benefit is that it saves money. King-Man likes that.
Setting up an easy system for washing, drying, and storing plastic bags.
A task isn't sustainable for me unless there's a routine, easy system in place. It took me awhile to figure out one for dealing with my plastic bags. I didn't have a good way to dry them or store them. They tended to pile up in a dirty mess; or after I got around to washing them, they were clean but still in a messy pile. But, I've got a system figured out now that makes it very easy and routine to manage cleaning, storing, and reusing plastic bags. Here's what I do.
A couple of points first:
- I don't wash and reuse bags that contained raw meat. Those get rinsed and recycled right away.
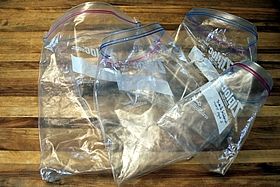
- I use freezer Ziploc bags for almost everything. They are thicker, sturdier, and hold up to multiple washings. The thicker/stiffer plastic is easier to wash, too. Even though they initially cost more to buy, they end up being more lasting and economical than the thinner bags.
Washing the bags
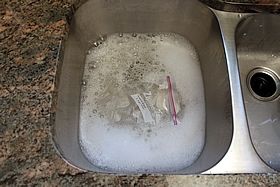
Method 1: In the Sink
I usually turn my bags inside out before I wash them. It's easier to get them clean that way. That may not be necessary if the bag isn't very dirty.

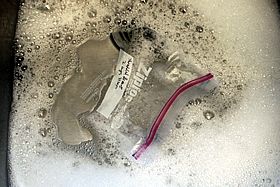
Fill the sink with an inch or two of sudsy water. It doesn't take much. Immerse the plastic bag, let some of the water seep inside through the opening, rub it around between your two hands. Rinse under running water.
Washing the bags
Method #2: In the Dishwasher
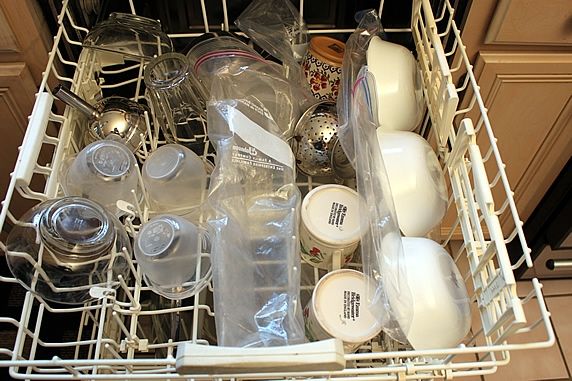
This method is what made cleaning plastic bags easier and more routine for me. It's what I usually do. The bags must be turned inside out first so that the jets of water hit the dirty surfaces of the bag. Place them in the top rack of your dishwasher.

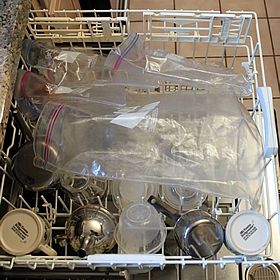
Move some of the other items in the diswasher around so that they anchor the bags. This keep the bags from flying around when the water is jetting through. You want to leave as much of the bags exposed as possible, while still holding them in place. Also, you don't want the bags to block the dishes from getting cleaned. After a try or two, you'll figure it out. My bags get really clean this way.
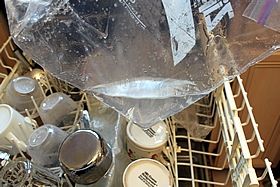
Some water may get inside the bags (which is really the outside of the bag, since it's been turned inside out); remove them carefully so the water doesn't end up all over the dishes or floor.
The dishwasher method is my favorite because:
- It's convenient, since I'm already running the dishwasher anyway.
- It doesn't use additional water, since I'm already running the dishwasher anyway. A conservation plus.
Drying the Bags
There are lots of gizmos out there you can buy for drying plastic bags like this. They work well, but aren't necessary. It's likely that you have what you need to make a quick drying gizmo of your own. Here's what I use:
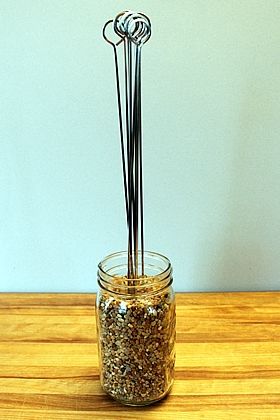
- A quart Mason jar filled with aquarium gravel - The gravel weights the jar and gives it stability while holding the skewers in place. There are many substitutes for the gravel like coffee beans, dried rice or beans, marbles, glass beads, buttons, etc.
- Barbecue skewers - mine are 15" long; the longer the better to accommodate bigger bags and get as much air circulation underneath as possible.

Stick the skewers into the gravel. That's it. I can use as many as I need, depending on how many bags I'm drying.
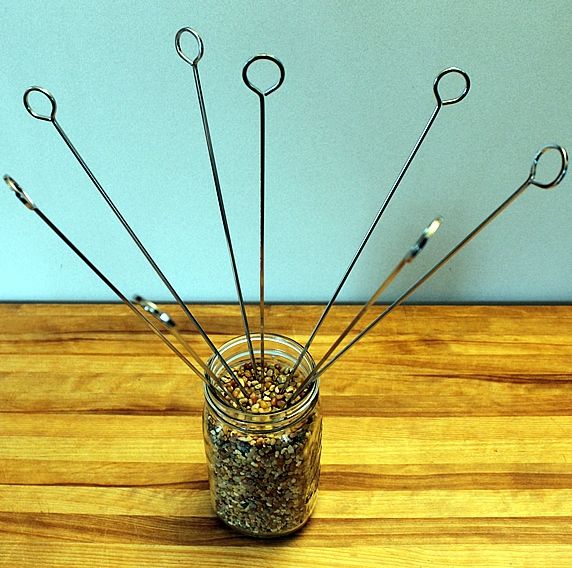
In addition to the skewers shown above, you can substitue anything that is long and thin, like chopsticks, bamboo skewers, wooden spoons, wooden dowels, etc.

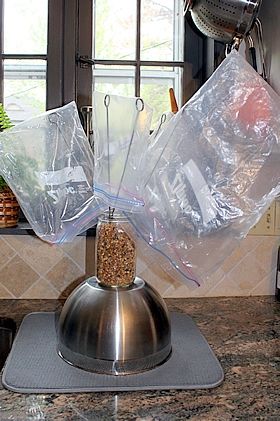
I place the jar on a dish drying mat (or use a towel) and remove the wet bags directly from the dishwasher to the skewers.

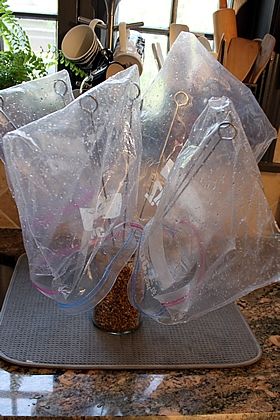
If I'm drying the taller, 2 gallon size bags, I put the jar on top of an inverted bowl to lift it up and get better air flow underneath the bags. This speeds up the drying time considerably.
When I'm not drying bags, I gather the skewers together in the center and store the jar under my sink. That way it's handy for drying bags, or I can pull out the skewers to use on the grill.
An Earth Day project for the kids! Putting together one of these bag drying jars could be a fun Earth Day activity to do with kids, grandkids, or in a classroom. The jars could be decorated, too. Paint them, tie them with ribbon, make a stained glass effect with pieces of colored tissue paper and glue. Click here for more jar decorating ideas. You can also use colored aquarium gravel to add some variety. Wooden dowels are available at craft or hardware store that can be used in place of the skewers, if you prefer.
Storing the Bags
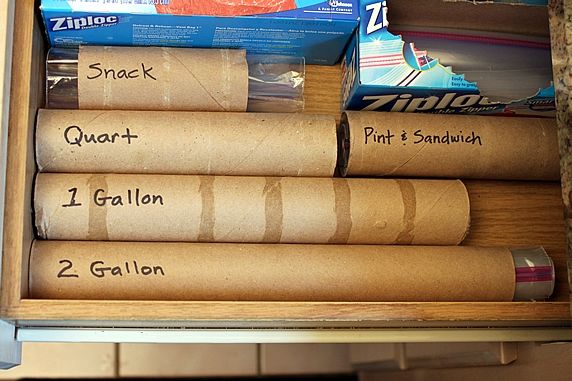
All credit goes to Grammy (aka my mom) for this clever idea. Before when I had washed my ziplocs, I was left with a pile of bags of misc. sizes that lay flat in my drawer. It was a hassle to find the right bag when I needed it. I copied Grammy's way of storing the bags using the cardboard tubes from paper towel and toilet paper rolls. Not only is this a totally awesome way to organize my used ziplocs, but it is also reusing those cardboard tubes. Another way to conserve. LOVE IT!
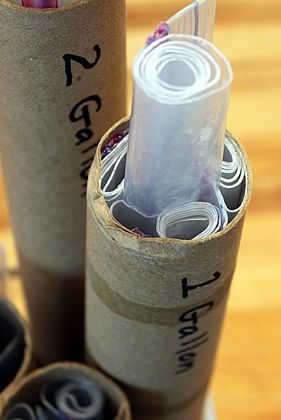
It may not be the prettiest thing, but it is so efficient. Label the tubes for whatever bag sizes you use. Then there is an obvious place for them to go.
Once your washed bags have dried, roll them one at a time. Roll tightly from the bottom towards the open end. This will push any air out as you roll to make them tighter and take up less space.
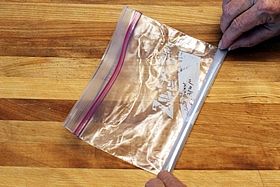
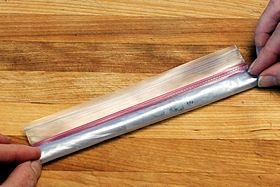
Insert the individually rolled bags into the cardboard tubes. It's easy to pull out a single bag when you need it, while leaving the rest of them intact inside the tube.
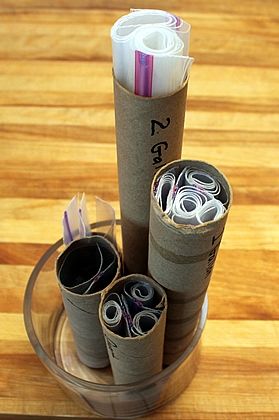
The tubes can be stored upright in a wide-mouth container. These are in a glass vase, but a large coffee can would work just fine, too. The whole container can be stored on a cabinet shelf for easy removal when needed.

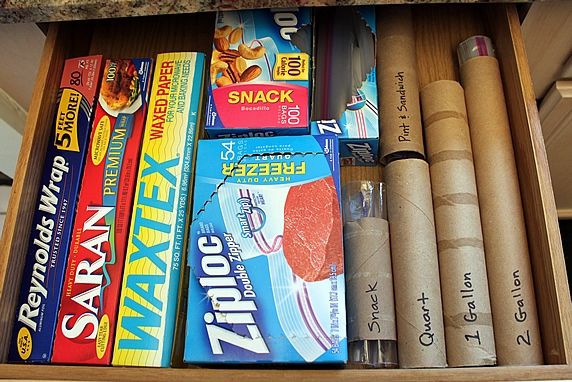
Or, you can lay them down flat in a drawer. That's what I do. When I need a bag, I first check my tubes for a used bag before taking a new one. It's an efficient system that's easy to maintain.
That's the 1 ft. bar that I have stepped over. A small step, but a step nevertheless, to waste less and be kinder to our beautiful Earth.
Have you taken any small steps to conserve in your home? Tell me what you're doing.
Make it a yummy Earth Day!
Monica
Here are a few gift guides I made to help: