


In this post, I'm sharing how I roast and peel the chiles I use in a number of recipes. This same technique can be used for any kind of pepper, from hot chile peppers to sweet red bell peppers and everything in between.
There are several ways to roast peppers:
- On the grill - This is the method I prefer for convenience and flavor. Place peppers in a single layer on the grill and turn until all sides of the peppers are blackened. (See step-by-step photos below.)
- Over a gas stove flame - Use tongs to hold individual peppers directly over the flame on a gas stovetop (kind of like roasting marshmallows); cook and turn until all sides are blackened. This technique takes the longest, because the peppers are cooked one at a time.
- Under the broiler in your oven - Place peppers in a single layer on a broiler pan that is 6" from the heat source; cook and turn until all sides are blackened.
Step-by-step photos
How to roast chile peppers on the grill
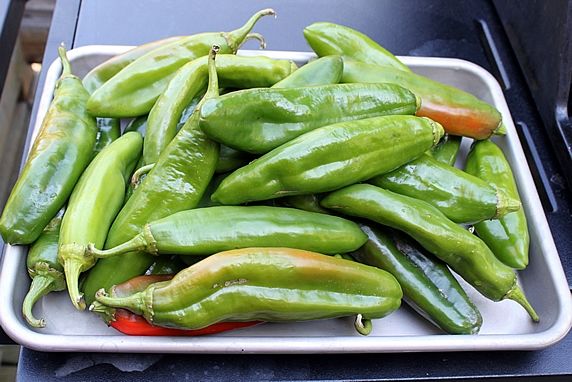
Here's how I roasted and peeled a batch of Anaheim chiles. Anaheim's are a fairly mild chile (although their heat can vary) and are the kind most often used in the canned chiles you can buy in the Mexican food aisle of your grocery store. They are so much better if you roast them yourself.
1. Gather your chiles. I normally do a big batch, while I'm at it. They can be used right away; and, the roasted chiles also freeze well. I love having them on hand and ready to use.
2. Next to the grill, you need a covered container for placing the chiles after they're roasted and while their still hot. Covering them allows them to steam, making them easier to peel. I use a large mixing bowl with a lid from a skillet. This is convenient, because I can quickly raise and lower the lid as I add cooked chiles to it. You can also cover a bowl with plastic wrap, use a covered pot, or place the roasted chiles in a paper bag.

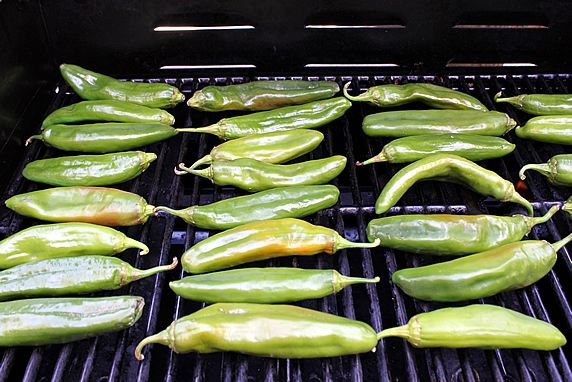
3. Heat up the grill. Use high, blazin' hot heat.
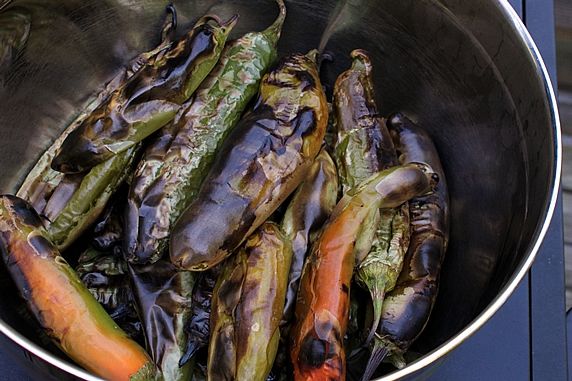
4. Place the chiles in a single layer on the grill rack.
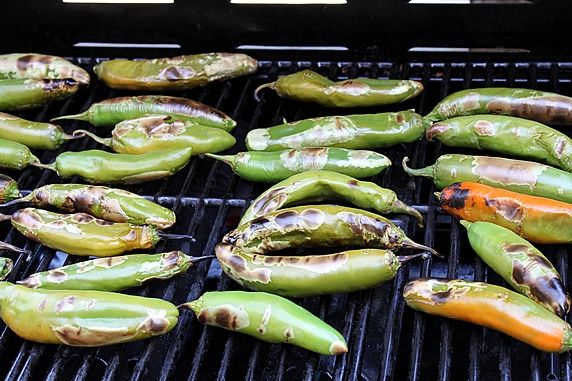
5. Use tongs to turn the chiles as they blacken. You want to roast them until the skin blackens, but you don't want the flesh of the chiles to burn. So, be attentive.
view on Amazon: 16" locking grilling tongs
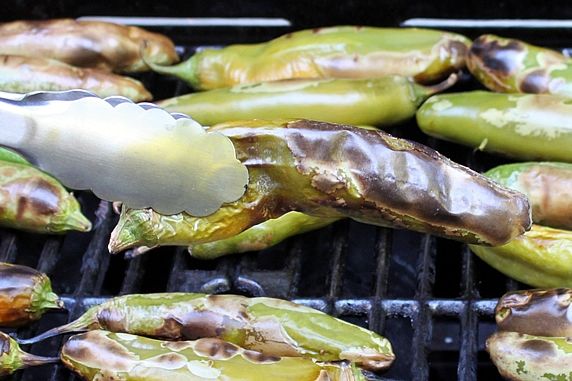
6. When the chiles are charred on all sides, remove them with tongs.
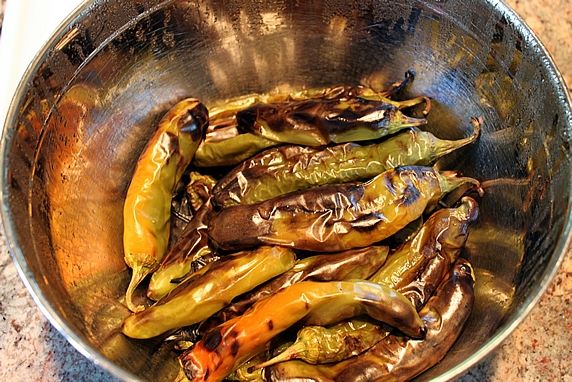
7. Remove the roasted chiles from the grill and immediately put them in the container with a lid.
8. As soon as you add the roasted chiles, cover the container. The purpose is to let the heat from the chiles create steam inside the bowl. This steaming process makes the chiles easier to peel. Once all of the roasted chiles are in the bowl, keep them covered for 10 minutes.

- NOTE: If you prefer your cooked chiles to have a firmer texture, skip the covering/steaming step so they don't cook and soften further. Remove the chiles from the grill and cool them uncovered. If the skin is well charred, they still will peel fairly easily while maintaining a firmer texture.
How to peel roasted chile peppers.
Note: Most roasted chiles (like these Anaheims) and bell peppers (like sweet red peppers) need to be peeled, because their skin is thick and unappealing to eat. Jalapenos are an exception. They have a very thin skin, and it is almost impossible to peel them. I don't bother and leave the skin on jalapenos.
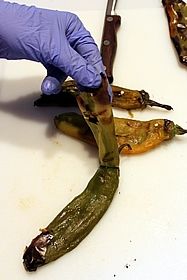
1. If you've roasted hot chile peppers, wear plastic gloves when peeling them. If you use your bare hands, you won't be able to wash away the "hotness" of the chiles and you can cause yourself a lot of pain if you accidentally touch your face or eyes with your hands. Inexpensive disposable plastic gloves can be purchased at drug and hardware stores. I prefer these, because they're thinner and fit snuggly. The kind of plastic gloves that are used for washing dishes are too thick and loose-fitting for precision work with the chiles.
2. Peel the charred skin off of the chiles. This should be easy if they've steamed while they're hot.
view on Amazon: disposable latex gloves

Keep pulling off the skin until all of your chiles are peeled.
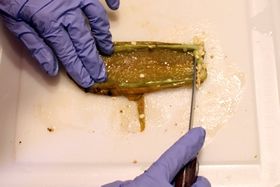
3. Gently pull the stems off of the chiles. Sometimes the seeds and membranes will stay attached to the stem as you pull them out. But not always.

4. Slice open each chile and use a knife to scrape out any seeds or membrane that remain inside.
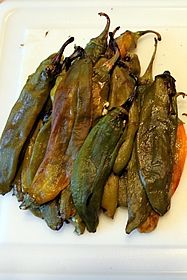
Here's what each chile should look like when you're finished. They can be left whole, chopped, or cut into strips. Use them right away, or freeze them in ziplocs.

How to freeze chiles. I leave some of them whole (as pictured above) and freeze them in ziplocs. However, most of my roasted chiles get chopped and frozen in 1/2 cup portions (the same size as cans of green chiles). That makes it easy to use them in recipes. Here's my blog post about how to freeze them:
view How to Freeze Green Chiles
What to do with these grilled chiles? Try making my Roasted Salsa or Roasted Salsa Verde. In a hurry? Make a batch of my 10-Minute Fire Roasted Salsa. All three salsas have that amazing roasted flavor.
Make it a Yummy day!