

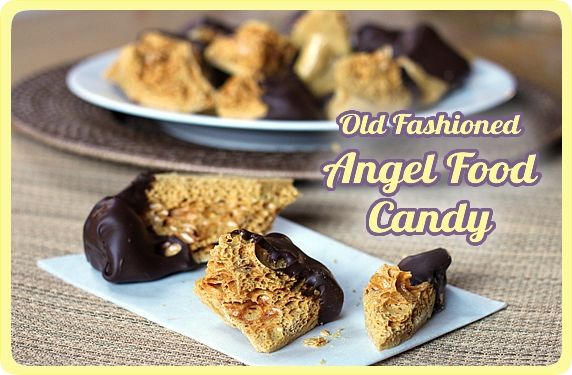
Old Fashioned Angel Food Candy (aka Sponge Candy)
A treat from long ago and an edible science experiment
 Print recipe

Today's recipe is another blast from the past. Angel Food Candy was King-Man's favorite candy as a kid, and was frequently made by his mom, Marie--along with her Molasses Cookies featured in a recent post. I've been hearing about this candy throughout our 31 years of marriage, but had never seen or tasted any. So, I wasn't even sure what King-Man was talking about.
When we were in Wisconsin for Christmas, I asked my sister-in-law, Rita, if she had her mom's recipe for this candy. I was thrilled when Rita pulled the recipe out of Marie's old recipe box and gave it to me. What a treasure! This tattered, yellowed recipe was touched by Marie's hands so many times as she made this favorite candy for her family. We figure it has to be at least 50-60 years old. We've missed Marie since she passed away 10 years ago, and making her recipes is a sentimental way to keep her memory alive. Here's one of the last photos I took of my mother-in-law along with the recipe card that Rita gave me.


It's easy! Turns out that this is one of the easiest candy recipes I've ever made. It does require a candy thermometer, but the short ingredient list and procedure make this a simple recipe for even a novice cook.
An edible science experiment. Back in the day, I ran a science lab at the elementary school T-Man and Brackenthebox attended. We did lots of fun science in the lab, and I often combined cooking with science to make it more fun and real for the kids. If I'd known about this recipe then, we would have totally made this in the science lab, or at the very least I would have made it at home with my boys. Although many recipes involve chemistry, this one is a particularly obvious and fast chemical reaction. It's basically a candy version of the classic baking soda and vinegar volcanoes that most every kid on the planet has made. This recipe is a fun way for them to eat their science experiment. CAUTION: This candy gets extremely hot as it cooks, so be especially careful if you're making this with kids.
Step-by-step photos for making Angel Food Candy
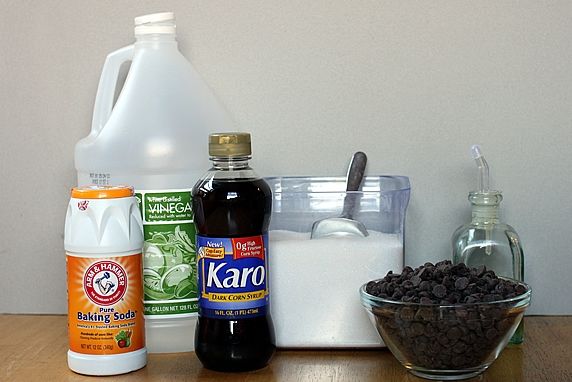
Step 1. Assemble the ingredients: sugar, dark corn syrup, vinegar, baking soda, chocolate chips, canola oil
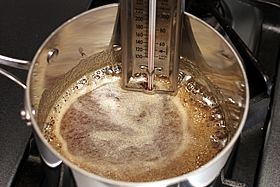
Step 2. Add the sugar, corn syrup and vinegar to a medium size saucepan.
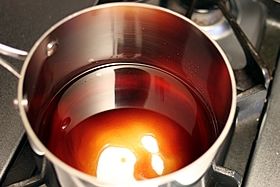
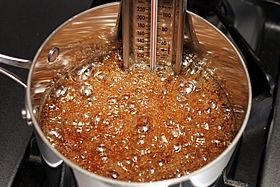
Step 3. Heat and stir constantly until sugar is dissolved and mixture starts to bubble.
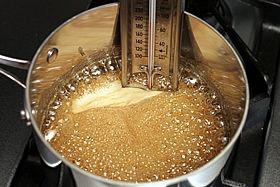
Step 4. Insert a candy thermometer in the pan and heat mixture to 300 degrees without stirring. It will bubble and foam just a bit.
(click here for Amazon link to my favorite candy thermometer)
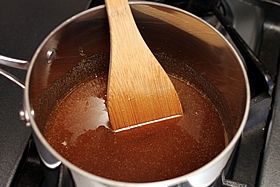
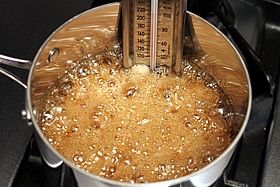
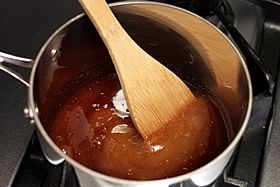
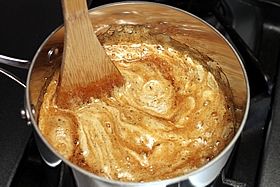
Step 5. The mixture will start to darken as it reaches 300 degrees. Remove it from the heat and quickly stir in the baking soda. Stir it just until the color is even throughout, stirring out the streaks of dark and light color like you see below in the photo on the right.
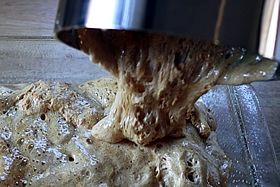
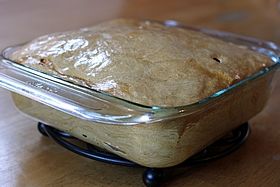
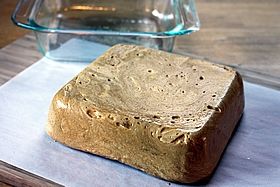
Step 6. Quickly pour mixture into an 8x8 pan that has been buttered or coated with cooking spray. Don't smooth or even out the top--it will smooth out on it's on. The mixture will rise some and may fall slightly--that's normal.
This is where it really looks like a science experiment. The mixture looks like lava rising & bubbling, just like a vinegar/baking soda volcano.
---------------------------------------------------------------
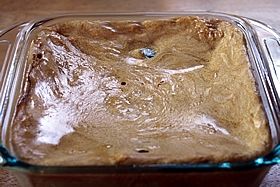
OOPS ALERT! I had a major goof the first time I tried this recipe. It was no fault of the recipe--totally my fault. I had started cooking the candy mixture when my doorbell rang. My friend, Sandy, was at the door; so I rushed her inside and told her I had to get back to my candy before it overcooked. The candy still hadn't reached 300 degrees, so I was fine; UNTIL I started chatting with Sandy, got distracted, and...you guessed it...the candy thermometer climbed past 300 to 320 degrees. DANG IT! I thought it might be okay anyway, so I poured the mixture into the 8x8 dish, and here's what happened. It grew, and grew, and grew, and finally fell. As you can see below, the mixture dripped over the side of the pan. After it cooled and I cut into it, the candy was burnt inside. Into the trash can. BTW, you can see I lined the pan with the aluminum foil on this failed attempt, and it turned out to be unnecessary. The candy comes out of the pan easily without the foil. Anyhoo... my advice is, if the doorbell rings while you're making this candy, DON'T ANSWER IT!
I guess this still worked as a science experiment--just not an edible one.
---------------------------------------------------------------
Back to the version of the recipe that worked.
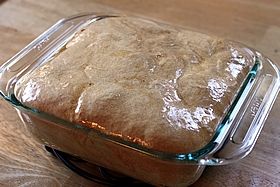
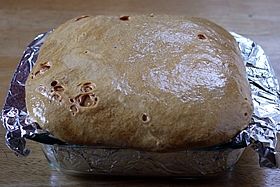
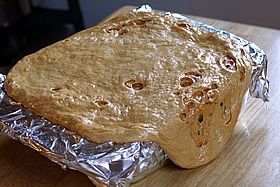
Step 7. Leave the candy undisturbed in the pan until it has completely cooled. Then flip the pan over onto a cutting board--the block of candy should fall right out.
Step 8. Use a knife to cut and jab the hardened candy into chunks.
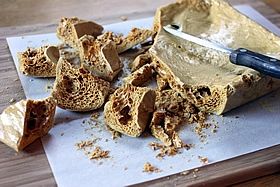
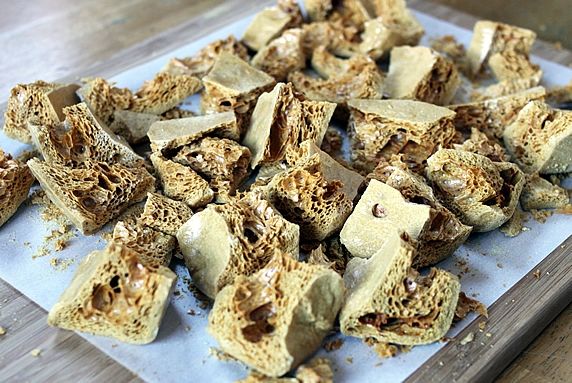
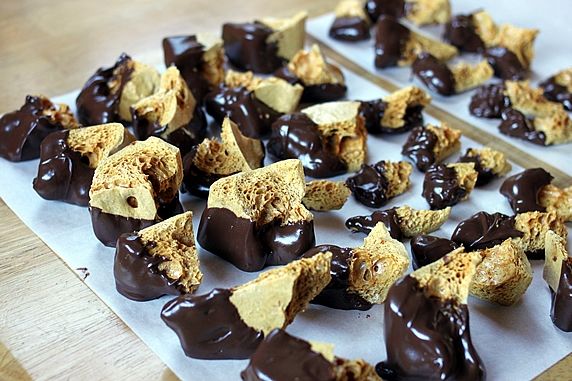
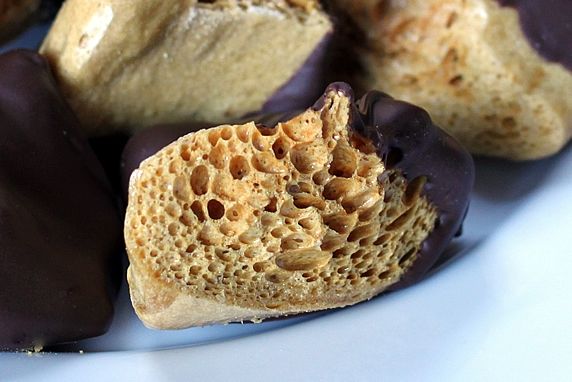
You can't cut even pieces. They have a mind of their own and break off into all kinds of different sizes and shapes. That's part of the fun. This candy looks irregular and rugged--just like pieces of hardened lava.
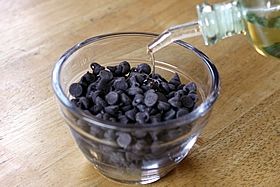
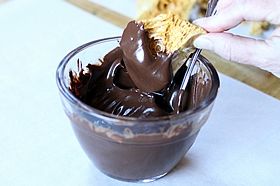
Step 9. In a microwave safe bowl, combine 2 tablespoons canola oil and 2 cups chocolate chips. Cook at full power in the microwave, stopping and stirring in 20 second intervals just until the chips are completely melted when stirred in (approx. 60 seconds total).
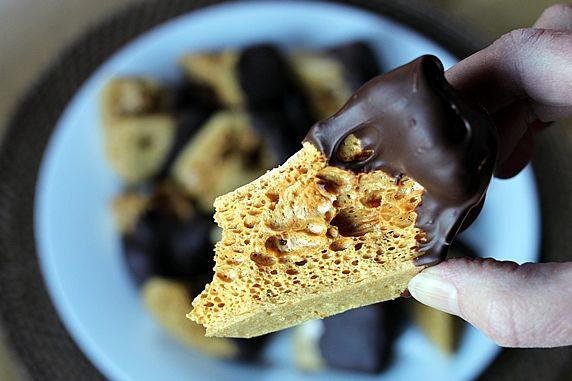
Step 10. Dip 1/3 to 1/2 of each candy piece in the melted chocolate and place on parchment or wax paper until cool and hardened. Melt remaining chocolate chips, if needed.
My mother-in-law covered the entire piece of candy with chocolate, but King-Man thought he'd like it better just partially dipped. That also makes it easier and tidier to dip in the chocolate. Plus, I like being able to see the texture of the inside of the candy
Now for the taste test. I was a little nervous. Would this taste like King-Man's childhood memories of his mom's candy? The verdict: YES! He loved it; and, after gobbling down six pieces one right after the other, said it tasted just like the candy Marie used to make. Whew! So, glad my batch measured up.
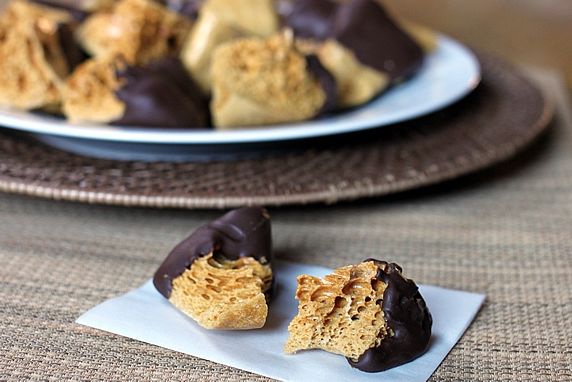
You can see why this is also called SPONGE CANDY. That's exactly what it looks like. Another name for it is SEAFOAM CANDY. It has a light, airy, crunchy texture that falls apart in your mouth when you bite into it.
I took this batch of Angel Food Candy along when we were on vacation with T-Man. He tasted it for the first time and described it as "puffy peanut brittle without the peanuts". Hmmm. I guess that kinda sums up the taste. For me, it's the texture and unique shapes that make it fun. But, for King-Man, it's a throwback to his childhood. So glad this one measured up to his memories. I love a recipe with a history.
Make it a yummy day!
![]()
In microwave-safe bowl, combine 2 tablespoons canola oil and 2 cups chocolate chips. Cook at full power in microwave, stopping and stirring in 20 second intervals just until completely melted (approx. 60 seconds total). Dip 1/3 to 1/2 of each candy piece in melted chocolate and place on parchment or wax paper until cool and hardened. Melt remaining chocolate chips and oil, if needed. Store in airtight container.
A vintage recipe from my mother-in-law Marie.