


 Print recipe

I love bacon. I know too much of it isn't good for me. But, everything in moderation, right? Bacon is just too good to eliminate it completely from my diet. The flavor, the crispy texture. Yum. I just love bacon. Period.
Bacon has so much flavor that a small amount can be sprinkled on a Harvest Salad or bowl of Baked Potato Soup, and it adds a delectable layer of yummy that takes the dish to a new level. Or, added to a burger or sandwich or baked beans. That's good, too. And, of course bacon and eggs are one of the most perfect unions on earth. I love bacon with just about anything. Have I made my point?
I cook bacon in the oven similar to the way Ina Garten makes it. I no longer fry it in a skillet, struggling as the pieces curl, grease spattering all over the stove, carefully flipping each piece over, grease spattering all over my shirt, stopping to pour off the grease that accumulates, finishing one batch and starting another, grease spattering . . . Well, you get the point here. Frying bacon is messy. Baking bacon in the oven eliminates all of those hassles:
- the bacon cooks evenly
- the bacon doesn't have to be turned over as it cooks
- all of the bacon can be cooked at once
- bacon grease doesn't spatter all over my stove top and shirt
- flavors can be added to the bacon while it's baking
- clean up is so dang easy
- it's healthier--much of the grease drips off as it bakes instead of soaking back into the bacon
If you haven't ever cooked bacon this way, I recommend that you give it a try.
step-by-step photos for
How to Make Oven-Baked Bacon.
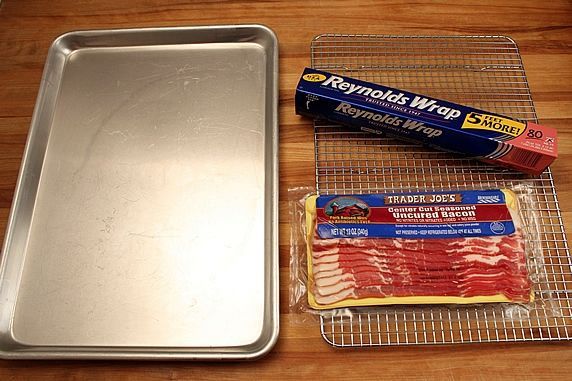
Step 1. Assemble these supplies:
- a baking sheet with a cooling rack that fits inside it--or a broiler pan will work, too.
- aluminum foil for lining the pan--this is for easy clean up, so it's optional.
- bacon--12 strips fit on one 13x18 baking sheet. If you have more bacon than will fit in one pan, you can fill as many pans as your oven can accommodate.
view on Amazon:
13 x 18 baking sheet (I have several of these; also available with a lid),
12x17 cooling/baking rack (fits perfectly inside the baking sheet; rated #1 by Cooks Illustrated)
Step 2. Line the baking sheet with aluminum foil and insert the rack inside the pan.
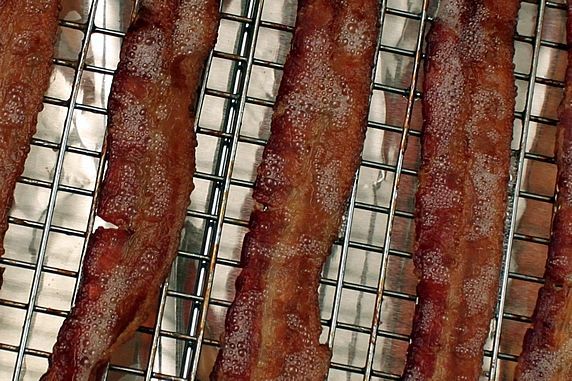
Step 3. Put the bacon strips on the rack in a single layer. Putting the bacon on a rack allows the grease to drip down into the pan and keep it from getting reabsorbed into the bacon. This makes it less greasy, resulting in crispier, healthier bacon.

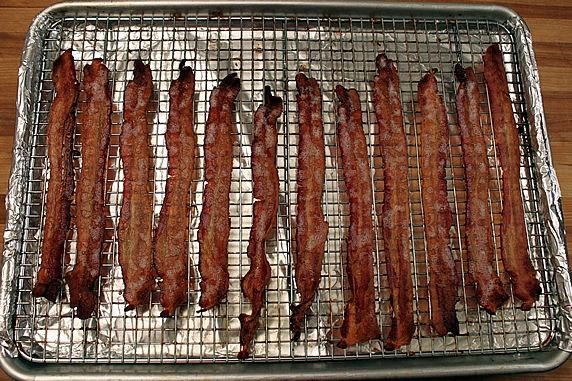
Step 4. Put the bacon in a cold oven and turn it on to 400 degrees. Bake until it's the desired doneness. (If you're cooking more than one pan, rotate them half way through baking time.) The baking time will vary depending on the thickness of the bacon and your preference--limp or crispy. Start checking it at 15 minutes. I cooked mine for 25 minutes. Some bacon may take longer. It can go from perfect to burnt very quickly in the last minute or two, so keep an eye on it. I like mine really crispy--right on the verge of burning.
Optional flavors can be added when the bacon has begun to brown (some of these toppings might burn if you add them earlier). Beware of the hot grease in the pan when you remove it from the oven to make any of these additions:
- Spice it up with freshly ground black pepper or cayenne.
- Sweeten it by brushing on a light coat of maple syrup or sprinkling with brown sugar.
- Make it cheesy by sprinkling bacon with Parmesan cheese.
- Sprinkle with smoked paprika, garlic powder, or a dried herb or spice of your choice.
After adding flavors, return bacon to the oven until it reaches the desired doneness and crispiness.
I didn't add extra seasonings or flavors to the bacon below. It's just plain, ol' delicious bacon. I could eat this entire pan. Seriously.
Step 5. Remove cooked bacon from oven and eat right away; or, keep it warm by returning it to a 200 degree oven for up to 30 minutes.

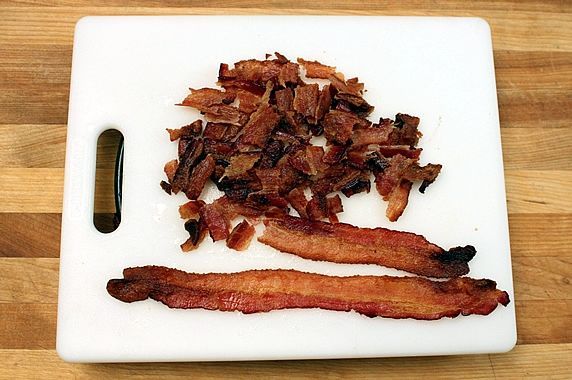
You can also chop or crumble the bacon to sprinkle on salad, soup, or casseroles.
Step 6. Roll up the aluminum foil and throw it away--no bacon grease to deal with. Yay!
Freeze or refrigerate. You can freeze or refrigerate the baked bacon in strips or crumbled for future use. It's just as easy to bake extra bacon and have it on hand. That way you only heat the oven once, and clean up once. Making extra bacon while you're at it is such a convenience!
To reheat, wrap bacon in a paper towel and zap it in the microwave for 20-30 seconds. How easy is that?
If you haven't tried this before, I hope you'll give bakin' bacon a try. Me? I'll never fry bacon again.
Make it a yummy day!
Monica
- 12 or more strips of bacon
- OPTIONAL FLAVOR ADDITIONS:
- freshly ground black pepper, to taste
- ground cayenne pepper, to taste
- maple syrup, lightly brushed on
- brown sugar, lightly sprinkled on
- Parmesan cheese, lightly sprinkled on
- smoked paprika, to taste
- garlic powder, to taste
- choice of other herbs or spices, to taste
--Put rack inside foil-lined pan.
--Arrange bacon strips in single layer on rack.
--Place pan in cold oven, and set to heat to 400 degrees.
--Bake for 15-30 minutes, until desired crispness. Cooking time will vary depending on thickness of bacon. Watch carefully after 15 minutes; it can burn quickly toward the end of cooking time.
--If desired, when the bacon begins to brown, add an optional flavor from the ingredients list. (Adding them at the beginning may result in burning.) Return to oven until bacon is desired doneness.
--Once finished baking, bacon may be kept warm in 200 degree oven for up to 30 minutes.
--Refrigerate or freeze leftover strips or crumbled bacon.
--Reheat by wrapping in paper towel and heating in microwave for 20-30 seconds.