


 Print recipe

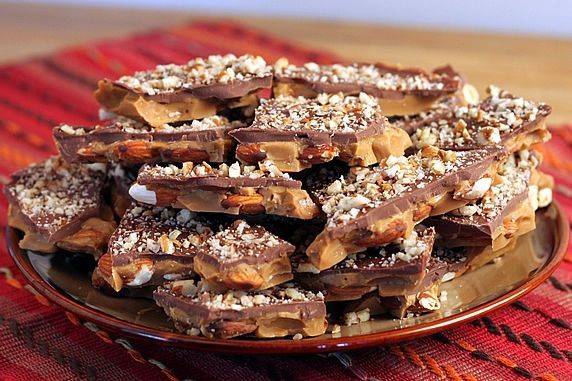
Over time most cooks develop a few signature recipes. This is one of mine. I've made hundreds of batches of this toffee through the years.
I found the original recipe in the December 1989 issue of Better Homes and Gardens magazine. Here's my recipe card with the original recipe, cut from the magazine and taped on the front and back of a card. (If you've never cooked using recipe cards, it's because I'm old and you're not.) It's yellowed, and the ink has faded, but this recipe is a classic that's stood the test of time.

Through the years, I've modified and simplified the original recipe; you can find my easier version at the end of this post.
What makes this my signature recipe? Well, for many years I've given this for gifts to friends, neighbors, co-workers, and my kids' teachers. For many years I've taken this toffee to numerous potluck meals and parties. And now, after all these years of gift giving and parties, I'm expected required to give this toffee as gifts and take it to parties. If I don't, I hear about it. Everyone looks forward to my toffee. As the holidays approach, King-Man and I start getting not-so-subtle hints like "I'm really looking forward to your toffee this year!" One of the great things about a signature recipe like this is that I have no decisions to make about what to make, give, bring. Anything but toffee is a disappointment. Decision made.
Often, signature recipes pass from a previous generation. My toffee recipe did the reverse. Once my dad (aka, Butchie) tasted it, he started making my toffee, too. Then he gave it as gifts. Then he was expected required to deliver toffee to friends during the holidays. I always think of my dad when I start making my annual countless batches of toffee, because I know he's in his kitchen doing the same thing. Here's a photo of Dad making toffee. I know that photo is at least 13 years old, so he's been making this awhile, too.

I'll show you how to make the toffee with my usual step-by-step photos. It's really easy once you get the hang of it. No candy thermometer required. You'll also find some downloadable gift tags toward the end of this post.
Step-by-step photos for making Toffee:
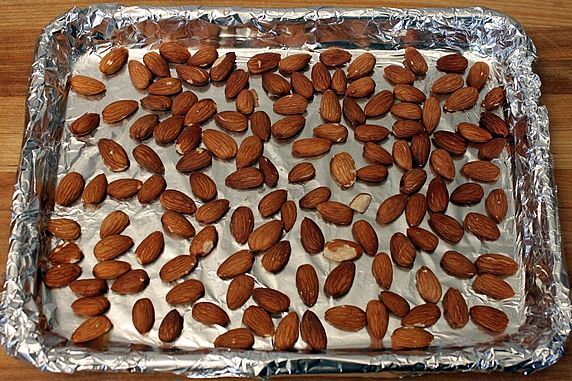
Step 1. Assemble the ingredients: sugar, butter, vanilla, almonds, pecans, salt, chocolate chips. You'll also need a baking sheet lined with aluminum foil. A 13x9 baking sheet is the perfect size, but you can also use a larger sheet and only use a portion of it.
view on Amazon: 13x9 baking sheet (with a convenient lid)

Step 2. Toast the almonds. The easiest way is to spread them out on a plate and zap them in the microwave for 2-3 minutes, stir after each minute. Times vary with different microwaves, so do a taste test after 2 minutes and see if they need more time. Mine take 2 minutes 30 seconds.
Step 3. Chop the pecans--you want them very fine.

Step 4. Spread the almonds out in a foil-lined pan. No need to grease the foil--the hardened toffee will peel off easily without greasing it.
Step 5. Cut the butter into chunks and add it to a 2 quart heavy saucepan.
Step 6. Add the sugar, vanilla and salt.

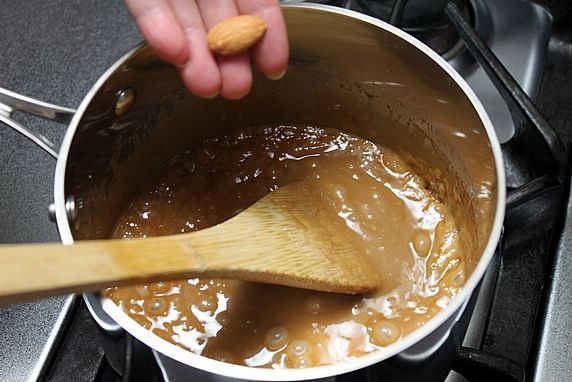
Step 7. Over medium-high heat, start melting everything together, stirring occasionally. I prefer a flat bottomed wooden spoon so that I can scrape the bottom of the pan more thoroughly as the toffee cooks.
- view on Amazon: flat bottomed wooden spoon

Step 8. Once the butter is completely melted, you need to stir constantly. It takes between approx. 7 and 10 minutes from this point to the finished toffee. The mixture will start to get foamy.

Step 9. Keep stirring. The mixture will gradually start to brown.

Step 10. Here's how you know when the toffee is ready. Keep one of the almonds near the pan. It's your color cue. When the toffee is the color of the almond skin, it's done! (I love this tip.) So much easier than fiddling with a candy thermometer. Don't freak out if your toffee is smoking. It's supposed to be smoking a little bit.
Perfect!
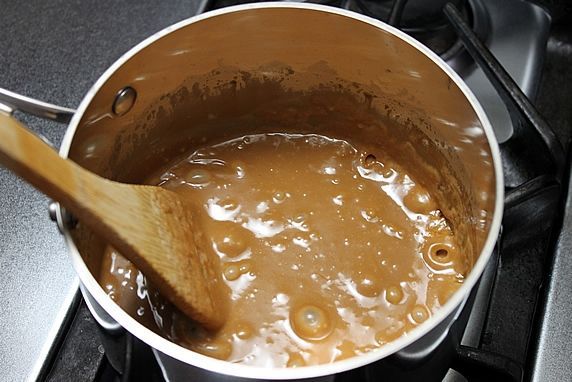
WORD OF CAUTION: You have to work quickly at this point. The toffee can go from perfect to burnt pretty fast. Once it's reached the almond color, quickly remove it from the stove and . . .
Step 11. Pour it onto the sheet of almonds. Don't pause to scrape the pan. It keeps cooking and can start burning if you don't pour it pretty quickly.

Step 12. Use your wooden paddle to spread the toffee to cover all of the almonds. You don't have much time to do this--it hardens quickly.

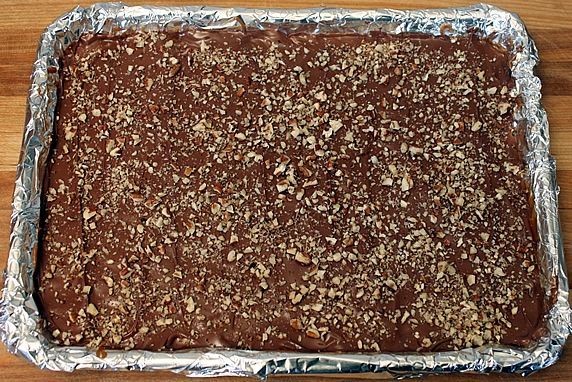
Step 13. Sprinkle the chocolate chips on the hot toffee.
Step 14. Wait one minute, and spread the melted chips until they're smooth.

- Clean-up tip: While the saucepan is still hot, fill it with hot water (not cold water--the shock might warp your pan). Put your wooden spoon in there, too. Let it soak a few minutes. The toffee left behind in your pan should dissolve and come off easily.
Step 15. Sprinkle the pecans on top.
Step 16. Let it cool until the chocolate hardens. This can take awhile--up to 2 or more hours. That toffee is hot, and it takes time for it to cool enough for the chocolate to harden. Once it's cooled some you can speed it up in the fridge, if you're in a hurry.
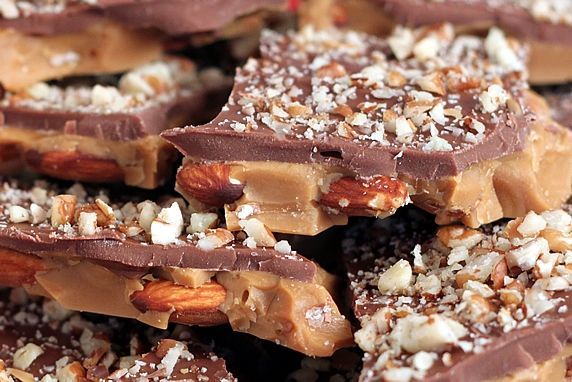
Step 17. Break the toffee into pieces. I usually break mine into approx. 25 pieces--but you can make it whatever size you want to. Smaller bite-sized pieces are better for party platters.
Troubleshooting tip!
Why Did My Butter Separate When Making Toffee?
If you read through the comments at the end of this post, you'll see that a few people have had problems with the butter separating from the toffee and not combining properly. If this happens to you, try adding a tablespoon of water to the mixture. My dad discovered that this succesfully fixed the problem for him every time.
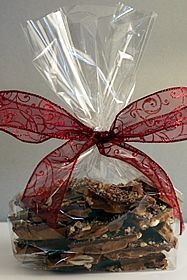
It's easy to turn the toffee into a great gift!
Bag it up and tie it with a bow. Add a gift tag, if you like.
view on Amazon: clear cellophane gift bags, Christmas cellophane bags, snowflake cellophane bags
Make it even more special by putting it in a container that can be used as a candy bowl.
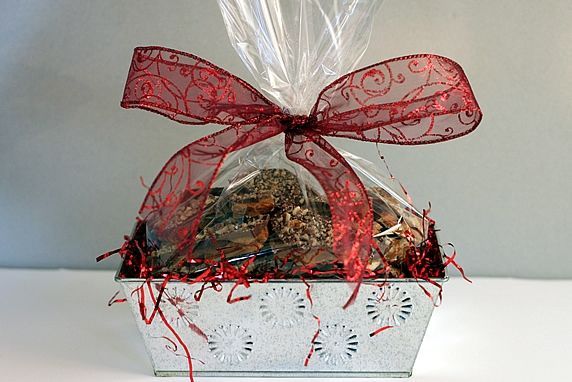
Gift tins are fun for candy giving, too. They are available in many stores during the holidays. I found these at my local grocery store.

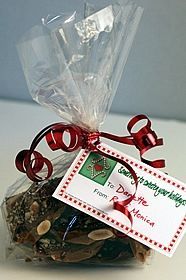
Downloadable gift tags for all of your sweet homemade gifts:
Here are some downloadable gift tags for you to choose from. You can print them on card stock, punch a hole in the corner and hang them with a string or ribbon. Or, print them on sticker paper and stick them to the gift. Click on the image to download and print a sheet of the tags:


Warning: It can be dangerous to keep this around the house. It's hard to resist, and it's impossible to eat just one piece.
So, that's my signature recipe. One of them. Do you have a signature recipe?
Make it a Yummy day!
Monica
- 1 cup unblanched (skin on) whole almonds
- 1 cup unsalted butter
- 1 cup sugar
- 3/4 teaspoon salt (reduce to 1/4 teaspoon if using salted butter)
- 1/2 teaspoon vanilla
- 1 (12 oz.) package milk chocolate chips (2 cups)
- 1/4 cup finely chopped pecans
TO MAKE A DOUBLE BATCH: Double all ingredients, cook according to directions above on stovetop in 4 to 5 quart pan and pour into prepared 13x18 half sheet pan.
TROUBLE SHOOTING TIP:
Sometimes, albeit rarely, the butter separates from the toffee mixture and doesn't combine properly. If this happens to you, try adding a tablespoon of water to the mixture. That should restore it so you can proceed with the recipe.
This post was updated 11/2013.